Unity 상태 패턴으로 구현하는 캐릭터 공중 컨트롤과 콤보 시스템
Unity C# 상태 패턴으로 점프·낙하·공중 공격을 분리하고 입력 버퍼와 캔슬 윈도우를 결합해 조작감 좋은 캐릭터 공중 컨트롤 및 콤보 시스템을 구현하는 방법을 설명합니다.
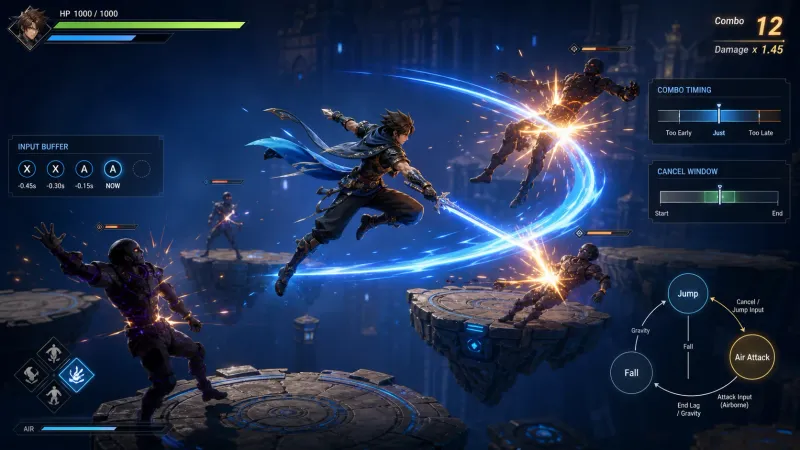
핵심 요약
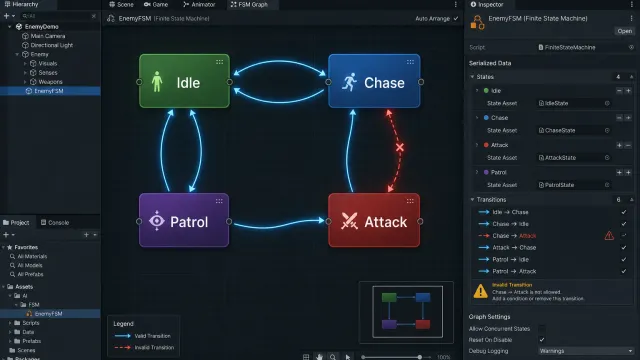
상태 패턴(State Pattern)은 캐릭터의 점프, 낙하, 공중 공격처럼 규칙이 서로 다른 행동을 독립된 상태 클래스로 분리하는 설계 방식이다. 공중 이동 가속도, 입력 버퍼(Input Buffer), 공격 캔슬 윈도우를 상태별로 관리하면 조건문이 얽히지 않으면서도 반응성 좋은 콤보 시스템을 만들 수 있다.
이 글은 Unity 2022 LTS 이상과 C#의 CharacterController를 기준으로 설명한다. Rigidbody를 사용하더라도 상태 전환 구조와 입력 버퍼의 원리는 동일하다.
공중 컨트롤과 콤보 로직은 왜 복잡해지는가?
단순한 캐릭터 컨트롤러는 isGrounded, isJumping, isAttacking 같은 Boolean 값으로도 시작할 수 있다. 하지만 공중 공격과 캔슬이 늘어나면 상태 조합이 빠르게 증가한다.
| 요구 사항 | Boolean 중심 구현의 문제 | 상태 패턴의 처리 방식 |
|---|---|---|
| 점프 중 방향 전환 | 이동 조건이 여러 곳에 흩어진다 | AirborneState가 공중 가속도만 관리한다 |
| 공중 공격 | 점프와 공격 플래그의 조합을 검사한다 | AirAttackState가 공격 중 이동 규칙을 소유한다 |
| 공격 캔슬 | 애니메이션 시간 조건이 업데이트 루프에 섞인다 | 상태가 캔슬 가능 구간을 직접 판정한다 |
| 입력 버퍼 | 입력이 프레임마다 유실될 수 있다 | 컨텍스트가 입력 시각과 유효 시간을 보관한다 |
특히 공중 이동은 즉시 목표 속도로 바꾸기보다 가속도를 적용해야 자연스럽다. 현재 수평 속도를 v, 목표 속도를 v_target, 가속도를 a, 프레임 시간을 Δt라고 하면 다음처럼 접근할 수 있다.
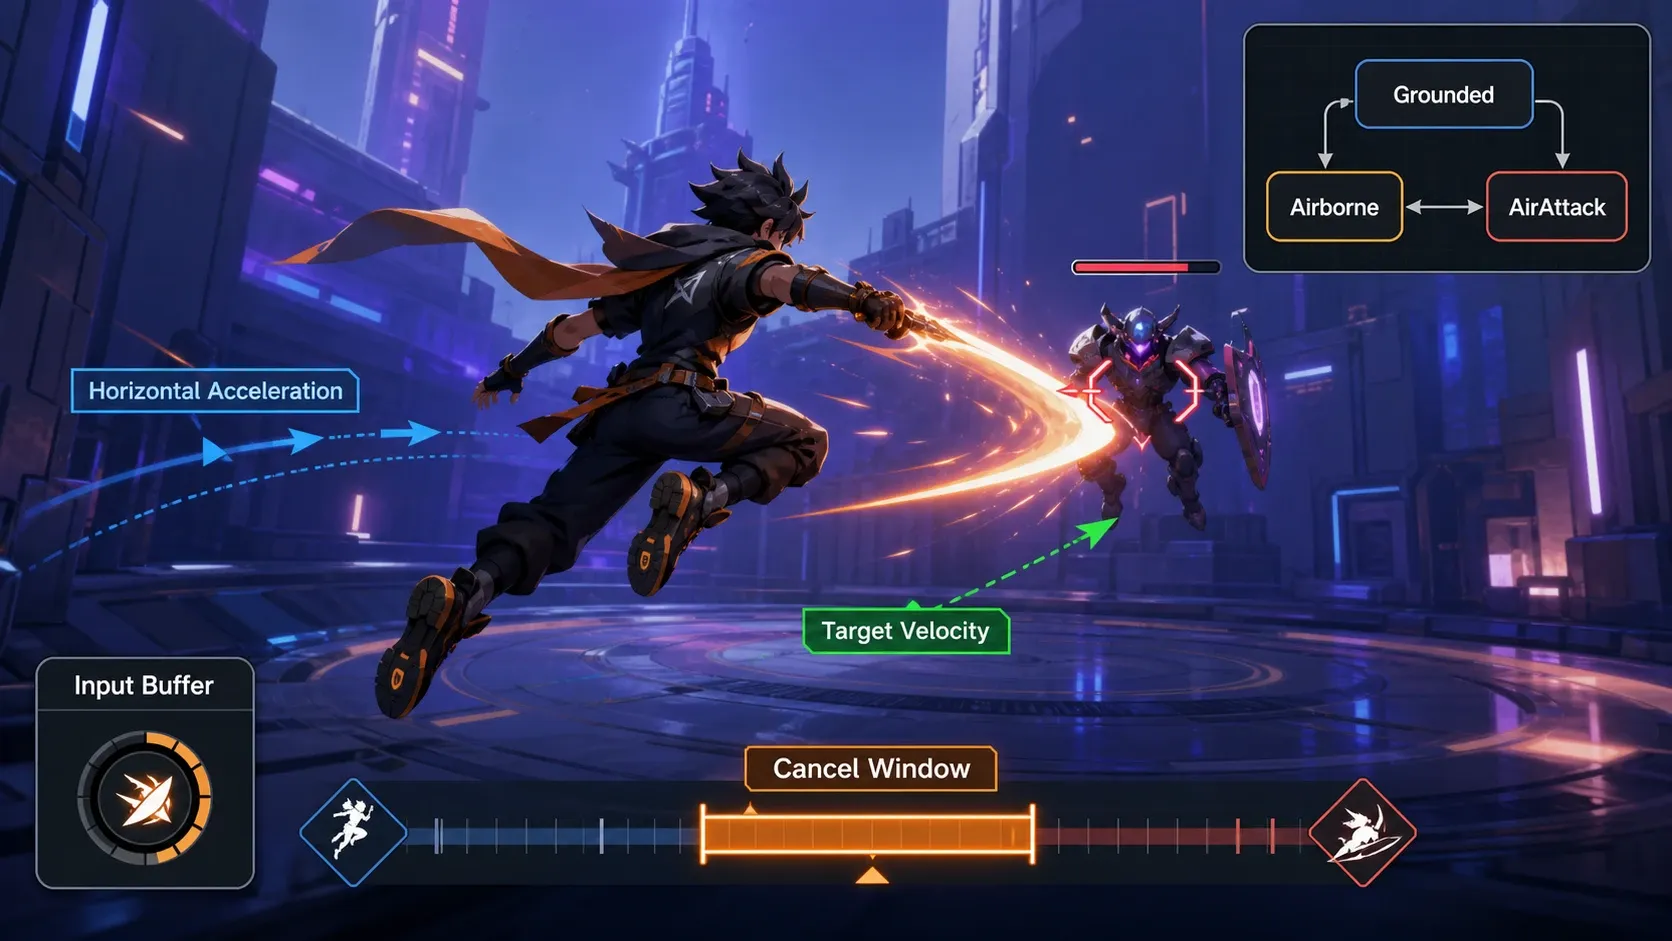
상태 패턴 기반 캐릭터 상태 머신은 어떻게 구성할까?
1. 상태 인터페이스와 컨텍스트를 분리한다
각 상태는 진입, 갱신, 종료 책임만 가진다. PlayerStateMachine은 현재 상태와 공유 데이터(속도, 입력 버퍼, CharacterController)를 보관하고 전환만 담당한다.
public interface IPlayerState
{
    void Enter();
    void Tick();
    void Exit();
}

public sealed class PlayerStateMachine : MonoBehaviour
{
    [field: SerializeField] public CharacterController Controller { get; private set; }
    [field: SerializeField] public float GroundSpeed { get; private set; } = 6f;
    [field: SerializeField] public float AirSpeed { get; private set; } = 5f;
    [field: SerializeField] public float AirAcceleration { get; private set; } = 18f;
    [field: SerializeField] public float Gravity { get; private set; } = -25f;
    [field: SerializeField] public float JumpVelocity { get; private set; } = 9f;

    public Vector2 MoveInput { get; private set; }
    public Vector3 Velocity { get; set; }
    public float AttackBufferedUntil { get; private set; }
    public IPlayerState CurrentState { get; private set; }

    private void Awake()
    {
        ChangeState(new GroundedState(this));
    }

    private void Update()
    {
        MoveInput = new Vector2(Input.GetAxisRaw("Horizontal"), Input.GetAxisRaw("Vertical"));

        if (Input.GetButtonDown("Fire1"))
            AttackBufferedUntil = Time.time + 0.15f;

        CurrentState.Tick();
    }

    public bool ConsumeAttackBuffer()
    {
        if (Time.time > AttackBufferedUntil) return false;
        AttackBufferedUntil = 0f;
        return true;
    }

    public void ChangeState(IPlayerState nextState)
    {
        CurrentState?.Exit();
        CurrentState = nextState;
        CurrentState.Enter();
    }
}
입력 버퍼 시간 0.15f는 예시다. 액션 게임에서는 보통 0.08초에서 0.20초 사이를 시작점으로 두고 프레임레이트와 애니메이션 길이에 맞춰 조정한다.
2. 지상 상태에서는 점프 전환만 명확히 한다
GroundedState가 점프 입력을 감지하면 수직 속도를 초기화하고 공중 상태로 전환한다. 점프 가능 여부를 다른 상태에서 중복 검사하지 않는 것이 중요하다.
public sealed class GroundedState : IPlayerState
{
    private readonly PlayerStateMachine machine;

    public GroundedState(PlayerStateMachine machine) => this.machine = machine;

    public void Enter()
    {
        machine.Velocity = new Vector3(machine.Velocity.x, -2f, machine.Velocity.z);
    }

    public void Tick()
    {
        Vector3 direction = new Vector3(machine.MoveInput.x, 0f, machine.MoveInput.y).normalized;
        machine.Velocity = direction * machine.GroundSpeed;

        if (Input.GetButtonDown("Jump"))
        {
            machine.Velocity = new Vector3(machine.Velocity.x, machine.JumpVelocity, machine.Velocity.z);
            machine.ChangeState(new AirborneState(machine));
            return;
        }

        machine.Controller.Move(machine.Velocity * Time.deltaTime);
    }

    public void Exit() { }
}
3. 공중 상태는 수평 제어와 중력만 담당한다
공중에서는 입력 방향으로 속도를 즉시 변경하지 않고 Vector3.MoveTowards로 수평 속도를 보간한다. 이 방식은 방향 전환의 감각을 유지하면서 공중에서 과도하게 미끄러지는 문제를 줄인다.
public sealed class AirborneState : IPlayerState
{
    private readonly PlayerStateMachine machine;

    public AirborneState(PlayerStateMachine machine) => this.machine = machine;

    public void Enter() { }

    public void Tick()
    {
        Vector3 inputDirection = new Vector3(machine.MoveInput.x, 0f, machine.MoveInput.y).normalized;
        Vector3 targetHorizontal = inputDirection * machine.AirSpeed;
        Vector3 currentHorizontal = new Vector3(machine.Velocity.x, 0f, machine.Velocity.z);

        Vector3 horizontal = Vector3.MoveTowards(
            currentHorizontal,
            targetHorizontal,
            machine.AirAcceleration * Time.deltaTime);

        machine.Velocity = new Vector3(
            horizontal.x,
            machine.Velocity.y + machine.Gravity * Time.deltaTime,
            horizontal.z);

        if (machine.ConsumeAttackBuffer())
        {
            machine.ChangeState(new AirAttackState(machine, comboIndex: 0));
            return;
        }

        machine.Controller.Move(machine.Velocity * Time.deltaTime);

        if (machine.Controller.isGrounded && machine.Velocity.y <= 0f)
            machine.ChangeState(new GroundedState(machine));
    }

    public void Exit() { }
}
공중 콤보의 입력 버퍼와 캔슬 윈도우는 어떻게 구현할까?
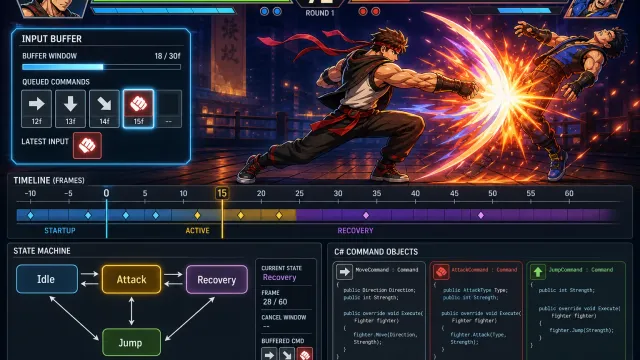
공중 공격 상태는 공격 지속 시간, 다음 공격을 받을 수 있는 구간, 현재 콤보 번호를 가진다. 여기서 핵심은 입력을 받는 시점과 다음 상태로 전환하는 시점을 분리하는 것이다.
- 플레이어가 공격 버튼을 누르면
AttackBufferedUntil에 만료 시각을 기록한다. - 공격 상태가 캔슬 윈도우에 진입하면 버퍼에 저장된 입력을 소비한다.
- 입력이 유효하면 다음
AirAttackState로 전환하고 아니면 공격 종료 후 낙하 상태로 돌아간다.
public sealed class AirAttackState : IPlayerState
{
    private readonly PlayerStateMachine machine;
    private readonly int comboIndex;
    private float elapsed;

    private const float AttackDuration = 0.42f;
    private const float CancelStart = 0.22f;
    private const float CancelEnd = 0.36f;
    private const int MaxCombo = 3;

    public AirAttackState(PlayerStateMachine machine, int comboIndex)
    {
        this.machine = machine;
        this.comboIndex = comboIndex;
    }

    public void Enter()
    {
        elapsed = 0f;
        // Animator.SetInteger("AirComboIndex", comboIndex);
        // Animator.SetTrigger("AirAttack");
    }

    public void Tick()
    {
        elapsed += Time.deltaTime;

        // 공격 중에도 약한 공중 조작을 허용한다.
        Vector3 target = new Vector3(machine.MoveInput.x, 0f, machine.MoveInput.y).normalized
                         * (machine.AirSpeed * 0.45f);
        Vector3 horizontal = Vector3.MoveTowards(
            new Vector3(machine.Velocity.x, 0f, machine.Velocity.z),
            target,
            machine.AirAcceleration * 0.5f * Time.deltaTime);

        machine.Velocity = new Vector3(
            horizontal.x,
            machine.Velocity.y + machine.Gravity * Time.deltaTime,
            horizontal.z);
        machine.Controller.Move(machine.Velocity * Time.deltaTime);

        bool isCancelable = elapsed >= CancelStart && elapsed <= CancelEnd;
        if (isCancelable && comboIndex < MaxCombo - 1 && machine.ConsumeAttackBuffer())
        {
            machine.ChangeState(new AirAttackState(machine, comboIndex + 1));
            return;
        }

        if (elapsed >= AttackDuration)
            machine.ChangeState(new AirborneState(machine));
    }

    public void Exit() { }
}
캔슬 가능 시간은 애니메이션 전체 길이의 비율로 관리하면 클립 교체에 대응하기 쉽다. 예를 들어 공격 애니메이션 정규화 시간 n을 사용한다면 두 번째 공격 허용 구간을 다음처럼 정의할 수 있다.
실무에서는 AnimatorStateInfo.normalizedTime 또는 Animation Event를 사용해 이 구간을 애니메이션과 동기화한다. 판정 프레임, 이펙트, 피격 경직도 같은 전투 데이터가 많아지면 ScriptableObject로 콤보 데이터를 분리하는 편이 유지보수에 유리하다.
조작감을 높이려면 어떤 값을 조정해야 할까?
| 파라미터 | 권장 시작 범위 | 높일 때의 효과 |
|---|---|---|
AirSpeed | 지상 속도의 70~100% | 공중에서 더 멀리 이동한다 |
AirAcceleration | 12~30 | 방향 전환이 빨라진다 |
Gravity | -18~-35 | 점프 체공 시간이 짧아진다 |
| 입력 버퍼 | 0.08~0.20초 | 콤보 입력이 더 관대해진다 |
| 캔슬 윈도우 | 공격 길이의 25~45% | 연속 공격이 쉬워진다 |
공중 공격 중 이동 감쇠율은 별도 값으로 둔다. 예제의 0.45f를 낮추면 공격의 무게감이 생기고 높이면 공중에서 자유롭게 궤도를 수정할 수 있다. PvP나 정밀 플랫폼 액션처럼 이동 성능이 밸런스에 직접 영향을 주는 게임에서는 상태별 수치를 데이터화해 테스트하는 것이 좋다.
자주 묻는 질문 (FAQ)
Update에서 입력을 읽어도 입력 버퍼가 필요한가?
필요하다. 공격 버튼을 캔슬 가능 프레임보다 조금 일찍 누르면 일반적인 즉시 입력 처리에서는 입력이 사라진다. 버퍼는 이 짧은 시간차를 흡수해 콤보 성공률을 높인다.
공중 공격마다 클래스를 새로 만들어도 괜찮은가?
예제 수준에서는 괜찮다. 상태 수가 많아지면 AirAttackState 하나에 공격 데이터와 콤보 인덱스를 전달하거나 상태 객체를 재사용하는 구조로 확장할 수 있다.
Rigidbody를 쓰면 무엇이 달라지는가?
상태 전환과 입력 버퍼 구조는 같다. 다만 이동과 중력 적용은 FixedUpdate에서 Rigidbody.velocity 또는 Rigidbody.linearVelocity를 통해 처리하고 물리 충돌 판정과 애니메이션 타이밍을 분리해야 한다.
정리
상태 패턴으로 공중 상태와 공중 공격 상태를 분리하면 이동 규칙, 중력, 캔슬 조건의 책임이 명확해진다. 여기에 시간 기반 입력 버퍼와 애니메이션 기반 캔슬 윈도우를 결합하면 프레임 단위 입력 손실을 줄이면서도 콤보 규칙을 예측 가능하게 유지할 수 있다.
다음 단계는 공격별 피해량, 넉백, 체공 보정, 히트 스톱을 AirAttackData ScriptableObject로 분리하고 상태 머신이 데이터를 읽어 실행하도록 확장하는 것이다.